1. 타일맵 Slice 한 후 사용 가능하게 Import 하기

Hiearchy 하위에 2D Objects > Tilemap > Rectangular 으로 추가

** 리소스는 itch.io에서 다운로드 받음


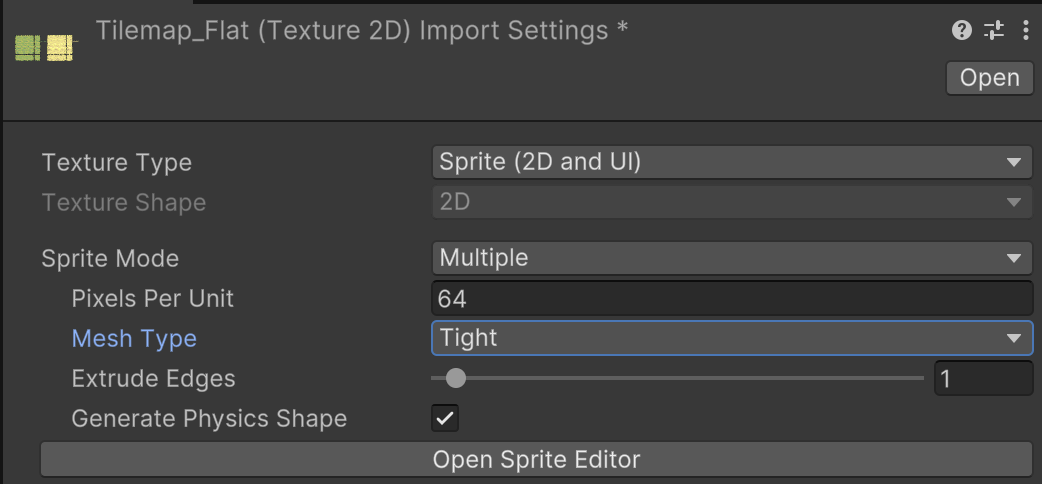
추가할 타일의 크기를 지정해주고 (64 픽셀이므로 Pixels Per Units에 64)

Open Sprite Editor 클릭

** 이번 실습과 같은 픽셀게임의 경우 Filter Mode : Point(No Filter)


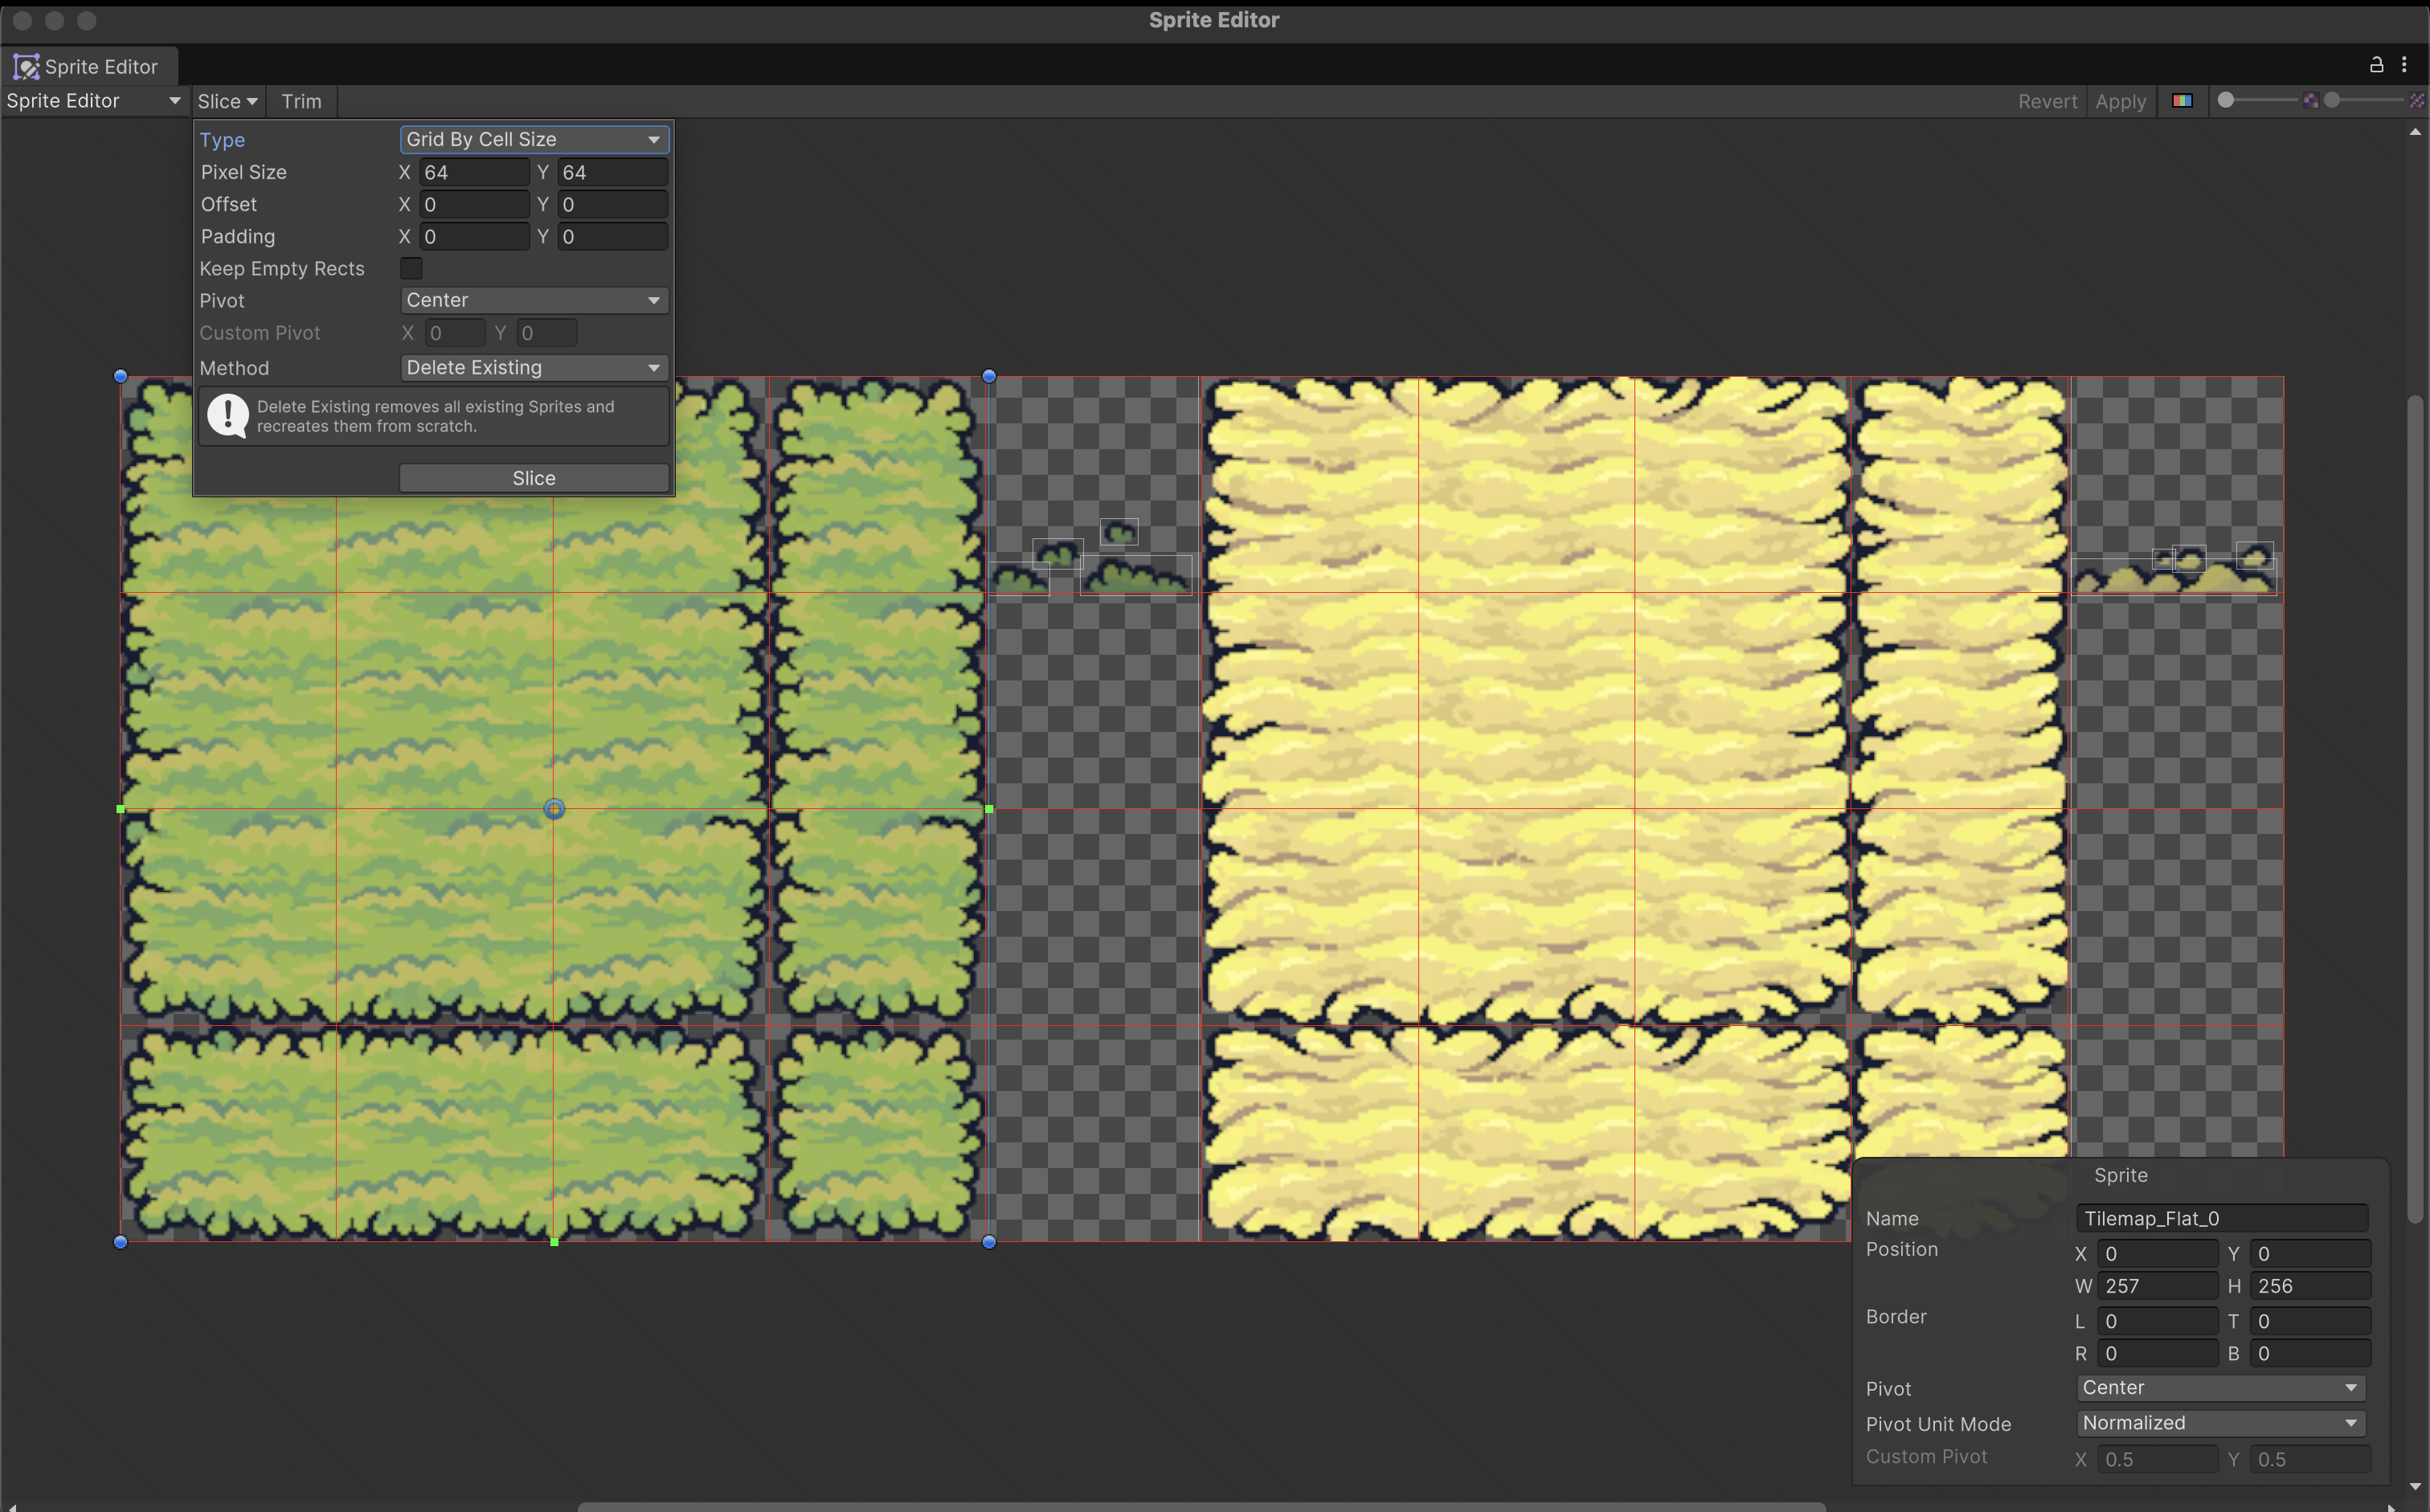
Sprite Editor 창에서 Slice > Type: Grid By Cell Size (64x64)으로 지정 후 Slice 버튼 클릭 후 Apply

Sprite Editor 닫고 Apply 클릭 (사용할 모든 Asset에 대해서 동일하게 처리)


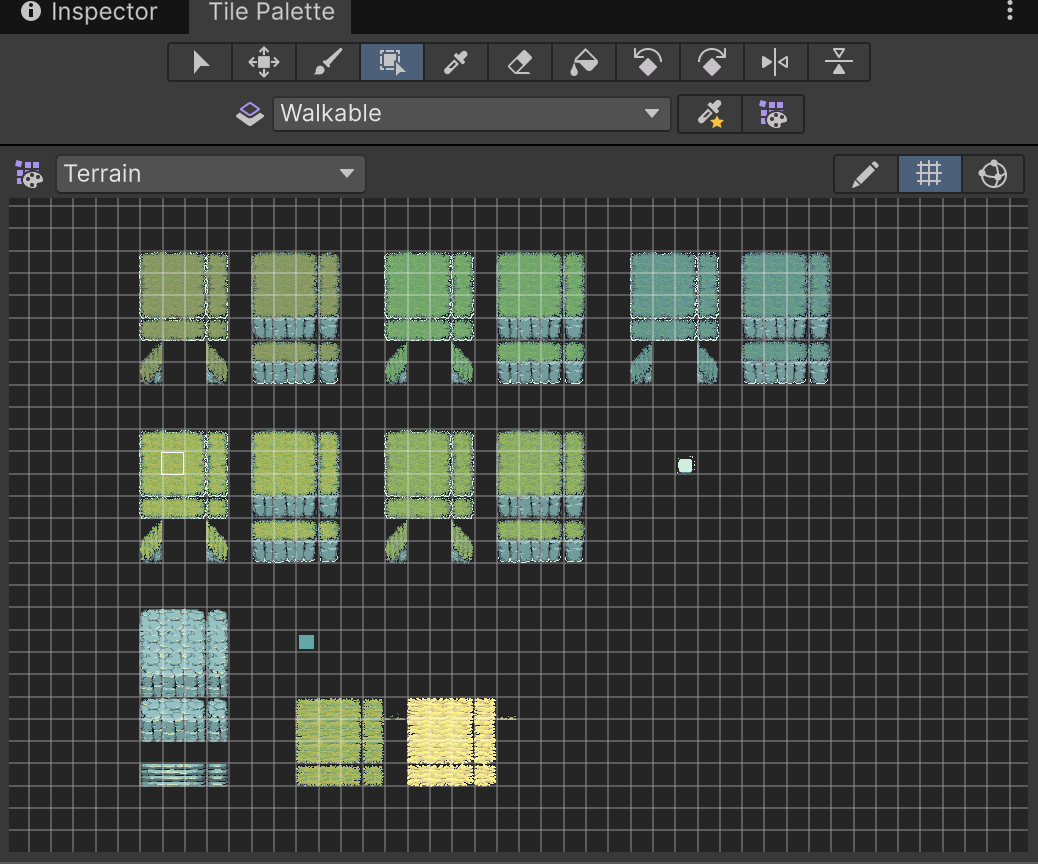
Tile Pallette 열어서 create new tilepalletes 클릭하여 폴더 지정

이후 앞서 Slice 해 두었던 타일맵을 드래그앤 드랍 

- 붓 또는 그림처럼 생긴 아이콘을 이용해서 배경 제작 가능


2.  타일맵 레이어 추가하기

타일맵 레이어가 존재해야 그림을 여러개 쌓을 수 있음

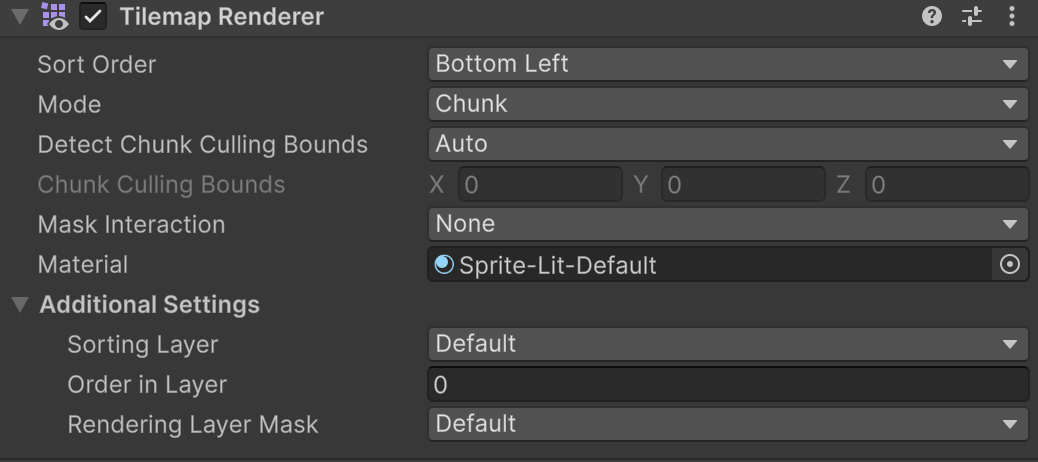
Grid 하위로 새로운 tilemap을 추가한 후 inspector에서 Order in Layer으로 (ex: -11) 조정하기 

아래는 Under Terrain 이라는 Layer에 땅바닥 타일을 그 위에 레이어에는 풀을 올린 모습이다.

맥에서 트랙패드를 이용 시 블랜더 사용 단축 키 정리

항목 단축키/명령어
화면 조정 (좌우 이동) shift + 두 손가락으로 이동
오브젝트 추가하기 shift + 두 손가락으로 클릭하여 추가할 위치 설정 후 Add에서 추가할 오브젝트 선택
오브젝트 삭제하기 X
Add 메뉴 열림 shift+A
오브젝트 잡기 G (이동 후 클릭을 해야 고정)
잡은 후 X 축 상에서 이동 : G -> x
잡은 후 Y 축 상에서 이동 : G -> y
잡은 후 Z(위 아리) 축에서 이동 : G -> z
툴 바 열기 t
오브젝트 회전하기 r (회전 후 클릭을 해야 적용)
+ x, y, z 클릭 시 각 축으로 회전
오브젝트 크기 조절 s
+ x, y, z 클릭 시 각 축으로 크기 변경
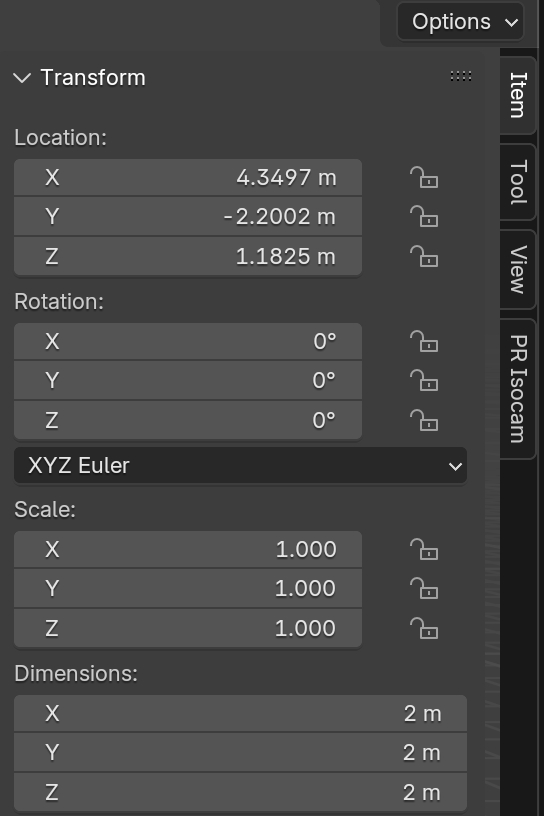
위치 및 크기 조정 메뉴  우측의 위치 조정 메뉴에서 조정 가능


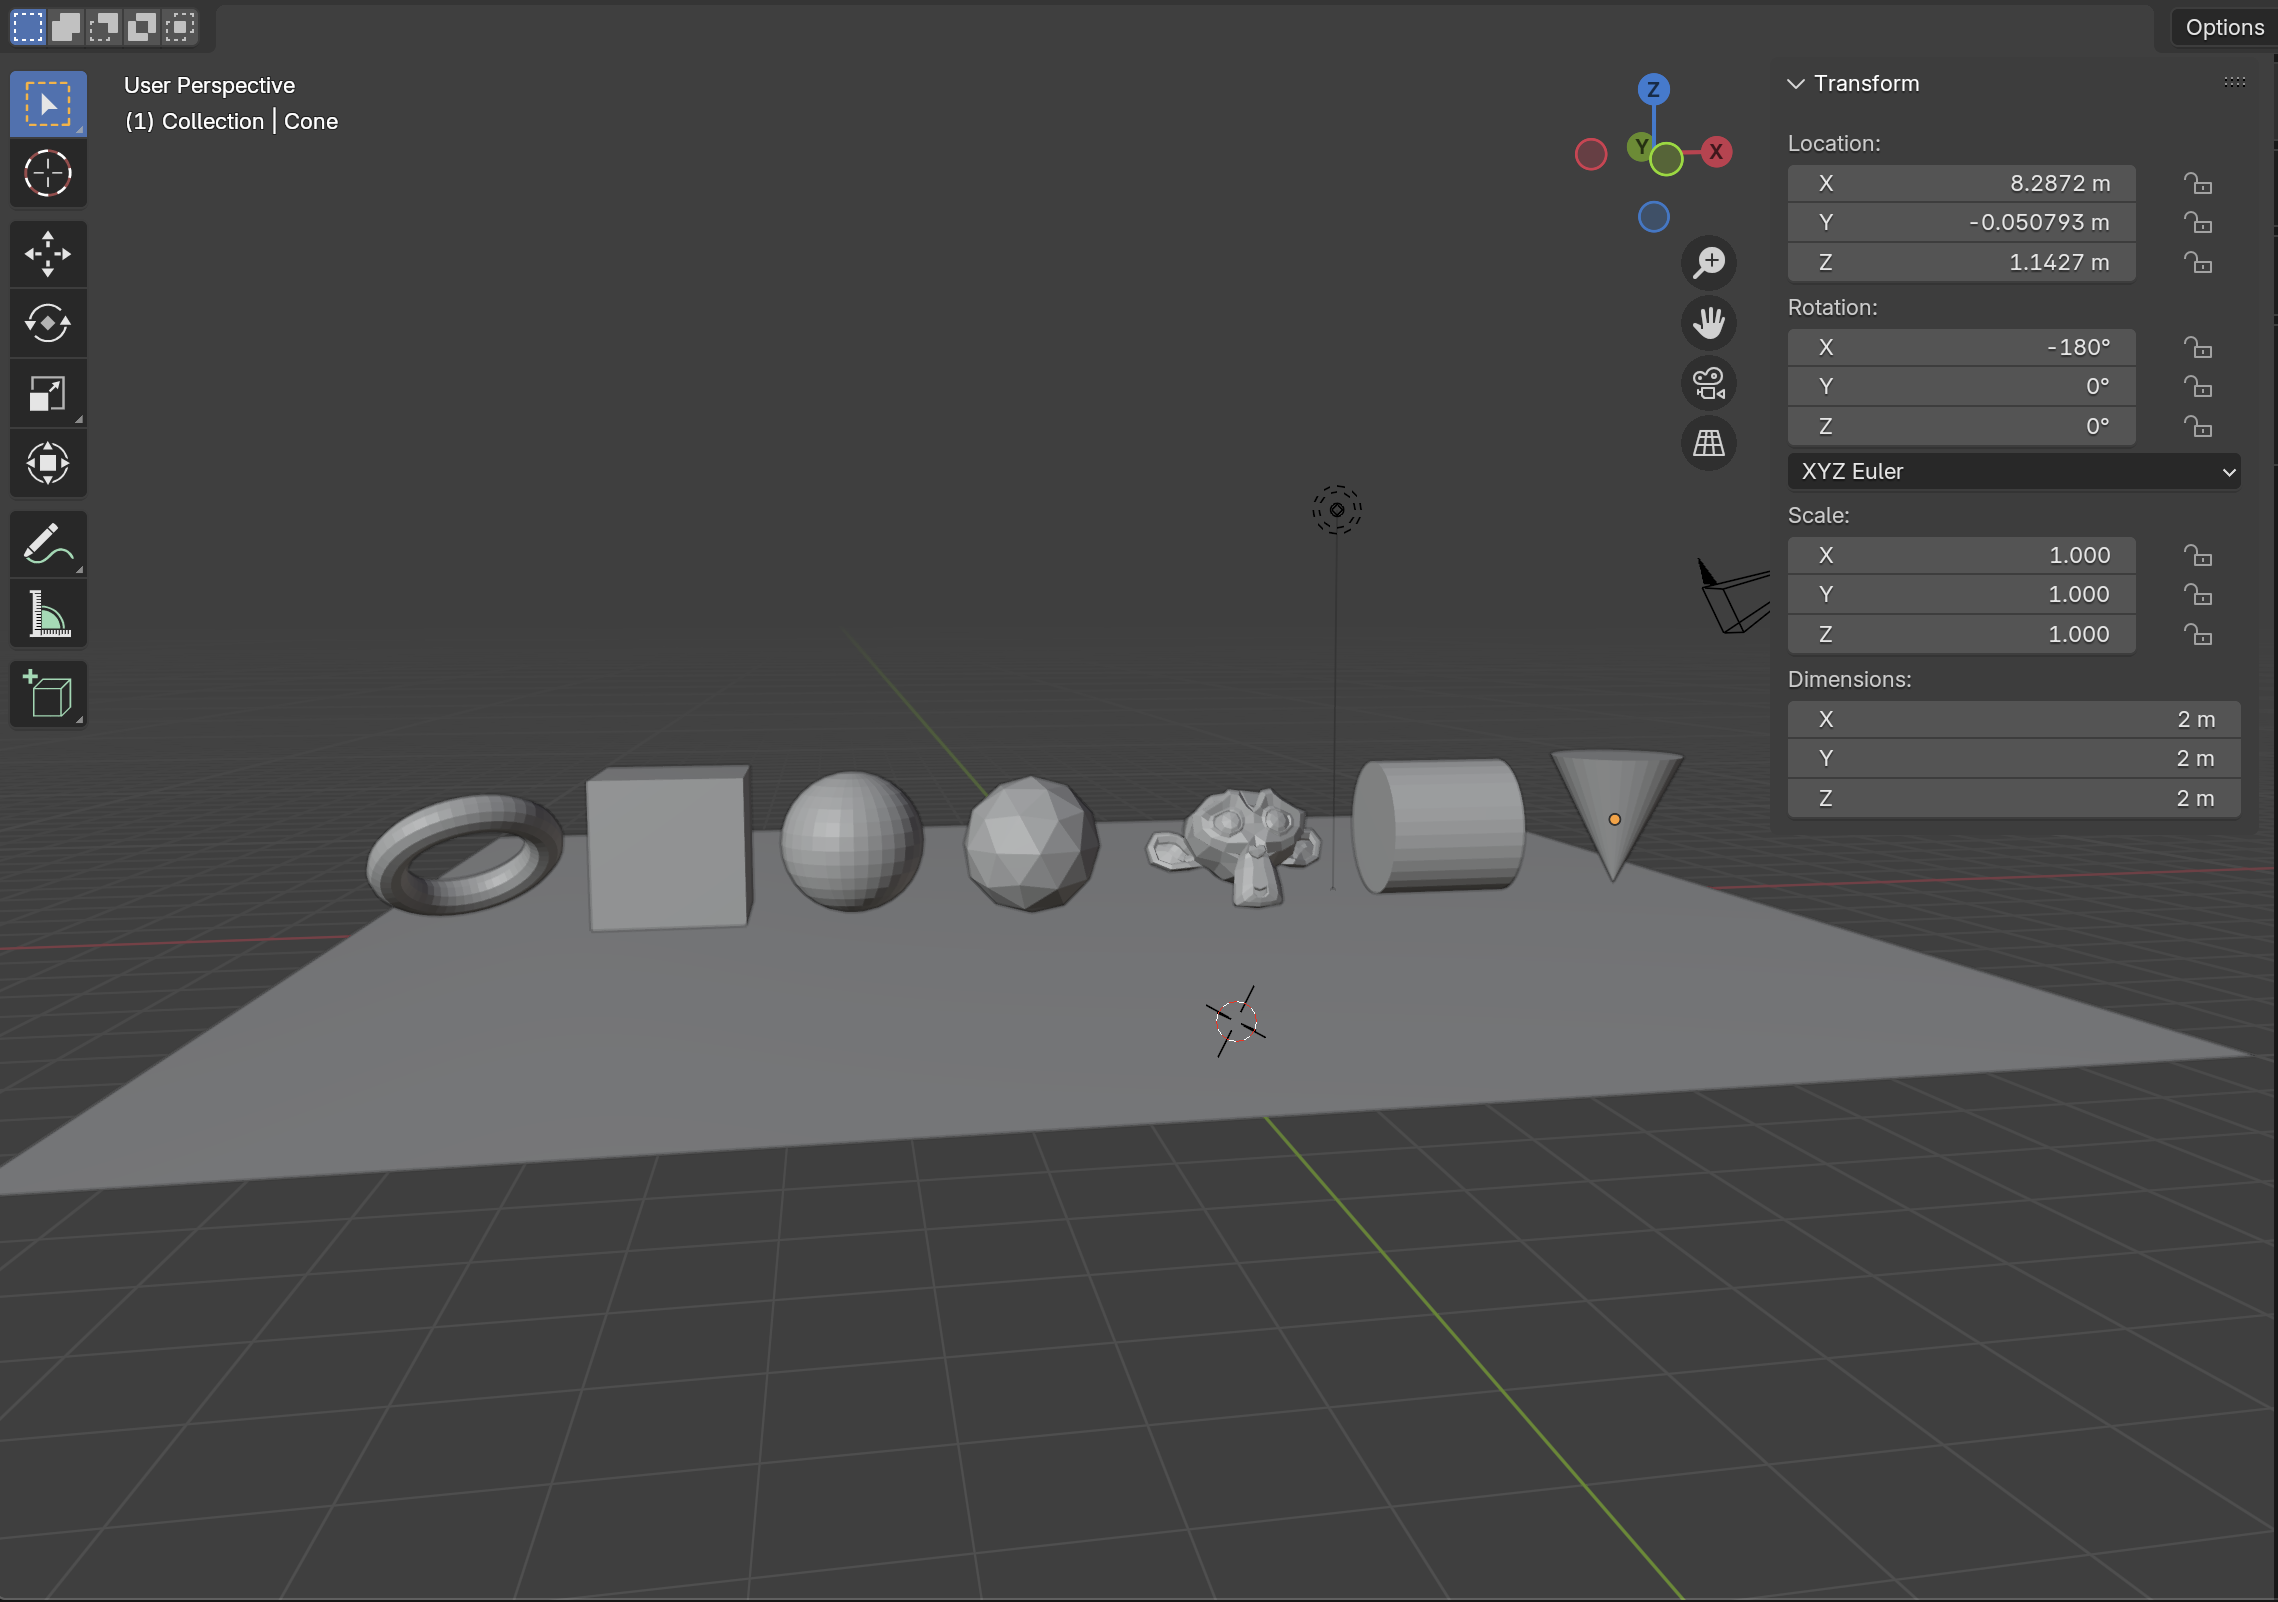
>> G + (x, y, z) 및 R + (x, y, z)를 이용해서 오브젝트를 추가하고 plane위에 한 줄로 정렬 시킨 모습

FastAPI 백엔드

1.  http 요청을 받아 처리하는 라우터 단에 아래 내용 추가

  1. HTTP 요청 받기 : ~/product/{상품아이디} URL로 요청이 들어올 경우 
  2. 내부로직 호출 : 상품 테이블을 조회해서 응답값을 딕셔너리 형태로 반환하는 내부 함수 get_product_by_id 함수 호출 
  3. 응답 돌려주기


# endpoints/product.py

# 개별 책 조회
@router.get("/{book_id}", response_model=ProductOut, status_code=status.HTTP_200_OK)
async def read_book(db: Annotated[Session, Depends(get_db)], book_id:int = Path(gt=0)):
    return crud_product.get_product_by_id(db, book_id)

** 라우터에서 기존 경로와 충돌 발생 안 하도록 경로 분리 필요


2. 상품 아이디별 DB 조회 함수 추가

# crud/product.py

# 특정 항목 조회하기
def get_product_by_id(db : Session, product_id : int):
    # db.query(Product)는 models에 있는 정보를 기반으로 SELECT * FROM PRODUCTS와 동일한 의미
    # .filter()는 where 절 조건을 의미
    # .first()는 실제 쿼리를 실행하는 부분으로 first는 단건 반환을 의미 
    product_model = db.query(Product).filter(Product.id == product_id).first()
    if product_model is not None:
        return product_model
    raise HTTPException(status_code=404, detail="product not found")


유의사항)  first()와 같은 실제 쿼리를 실행하는 함수 꼭 넣기(없으면 쿼리문만 만들어서 에러 발생)

first() 함수를 미포함하여 아래 에러 발생

-> 에러 내용에서 input 부분을 보면 sqlalchemy.orm.query.Query object가 들어왔다는데 이건 실행 안하고 쿼리문만 만들어 주었음을 의미한다. 

fastapi.exceptions.ResponseValidationError: 7 validation errors:
  {'type': 'missing', 'loc': ('response', 'id'), 'msg': 'Field required', 'input': <sqlalchemy.orm.query.Query object at 0x106245d00>}

React 상세 페이지 구성

1. App.jsx에 Loader 등록

App.jsx에 loader 정보 등록 후 상세페이지를 열 때 해당 로더를 실행하도록 함

// App.jsx

// loader 내용 추가
import {loader as SingleProductLoader} from './pages/SingleProduct'
const router = createBrowserRouter([
{
...
  children :[
  // 상세페이지를 열기 전 데이터를 조회하는 로더 추가
    {
      path : 'products/:id',
      element : <SingleProduct />,
      loader : SingleProductLoader
    },
  ]
  }


2. 상세페이지 구성

  • 개별 책 정보 백엔드에서 fetch해 오기
  • 조회해온 데이터 화면에 뿌리기
import { useLoaderData, Link } from "react-router-dom";
import { formatPrice, customFetch } from "../utils";
import { useState } from "react";

// 상세페이지를 구성하는데 필요한 데이터를 fetch해 가져오는 loader 정의
export const loader = async ({ params }) => {
  const response = await customFetch(`/product/${params.id}`);
  return { product: response.data };
};

const SingleProduct = () => {
  //loader로 부터 데이터 가져오기
  const { product } = useLoaderData();
  console.log(product);

  const { image, title, price, description, company, category } = product;

  // 가격 포맷하기
  const dollarsAmount = formatPrice(price);

  // 구매수량
  const [amount, setAmount] = useState(1);
  const handleAmount = (e) => {
    setAmount(parseInt(e.target.value));
  };

  return (
    <section>
      <div className="text-mid breadcrumbs">
        <ul>
          <li>
            <Link to="/">Home</Link>
          </li>
          <li>
            <Link to="/products">Products</Link>
          </li>
        </ul>
      </div>

      {/* PRODUCTS */}
      <div className="mt-6 grid gap-y-8 lg:grid-cols-2 lg:gap-x-16">
        {/* 이미지 */}
        <img src={image} alt={title} className="w-96 object-cover rounded-lg" />

        {/* 상품 내용 */}
        <div>
          <h1 className="capitalize text-3xl font-bold">{title}</h1>
          <h4 className="text-xl text-neutral-content font-bold mt-2">
            {company}
          </h4>
          <p className="mt-3 text-xl">{dollarsAmount}</p>
          <p className="mt-6 leading-8 text-gray-600">{description}</p>
          {/* 수량 선택*/}
          <div className="form-control w-full max-w-xs mt-6">
            <div className="flex items-center gap-5">
              <label className="label w-20">
                <h4 className="text-md font-medium -tracking-wider capitalize">
                  수량
                </h4>
              </label>
              <select
                className="select select-secondary select-bordered select-md flex-1"
                id="amount"
                value={amount}
                onChange={handleAmount}
              >
                <option value="1">1</option>
                <option value="2">2</option>
                <option value="3">3</option>
              </select>
            </div>
          </div>

          {/* 장바구니 버튼 */}
          <div className="mt-10 items-center">
            <button
              className="w-40 btn btn-secondary btn-md"
              onClick={() => console.log("add")}
            >
              장바구니 담기
            </button>
          </div>
        </div>
      </div>
    </section>
  );
};
export default SingleProduct;


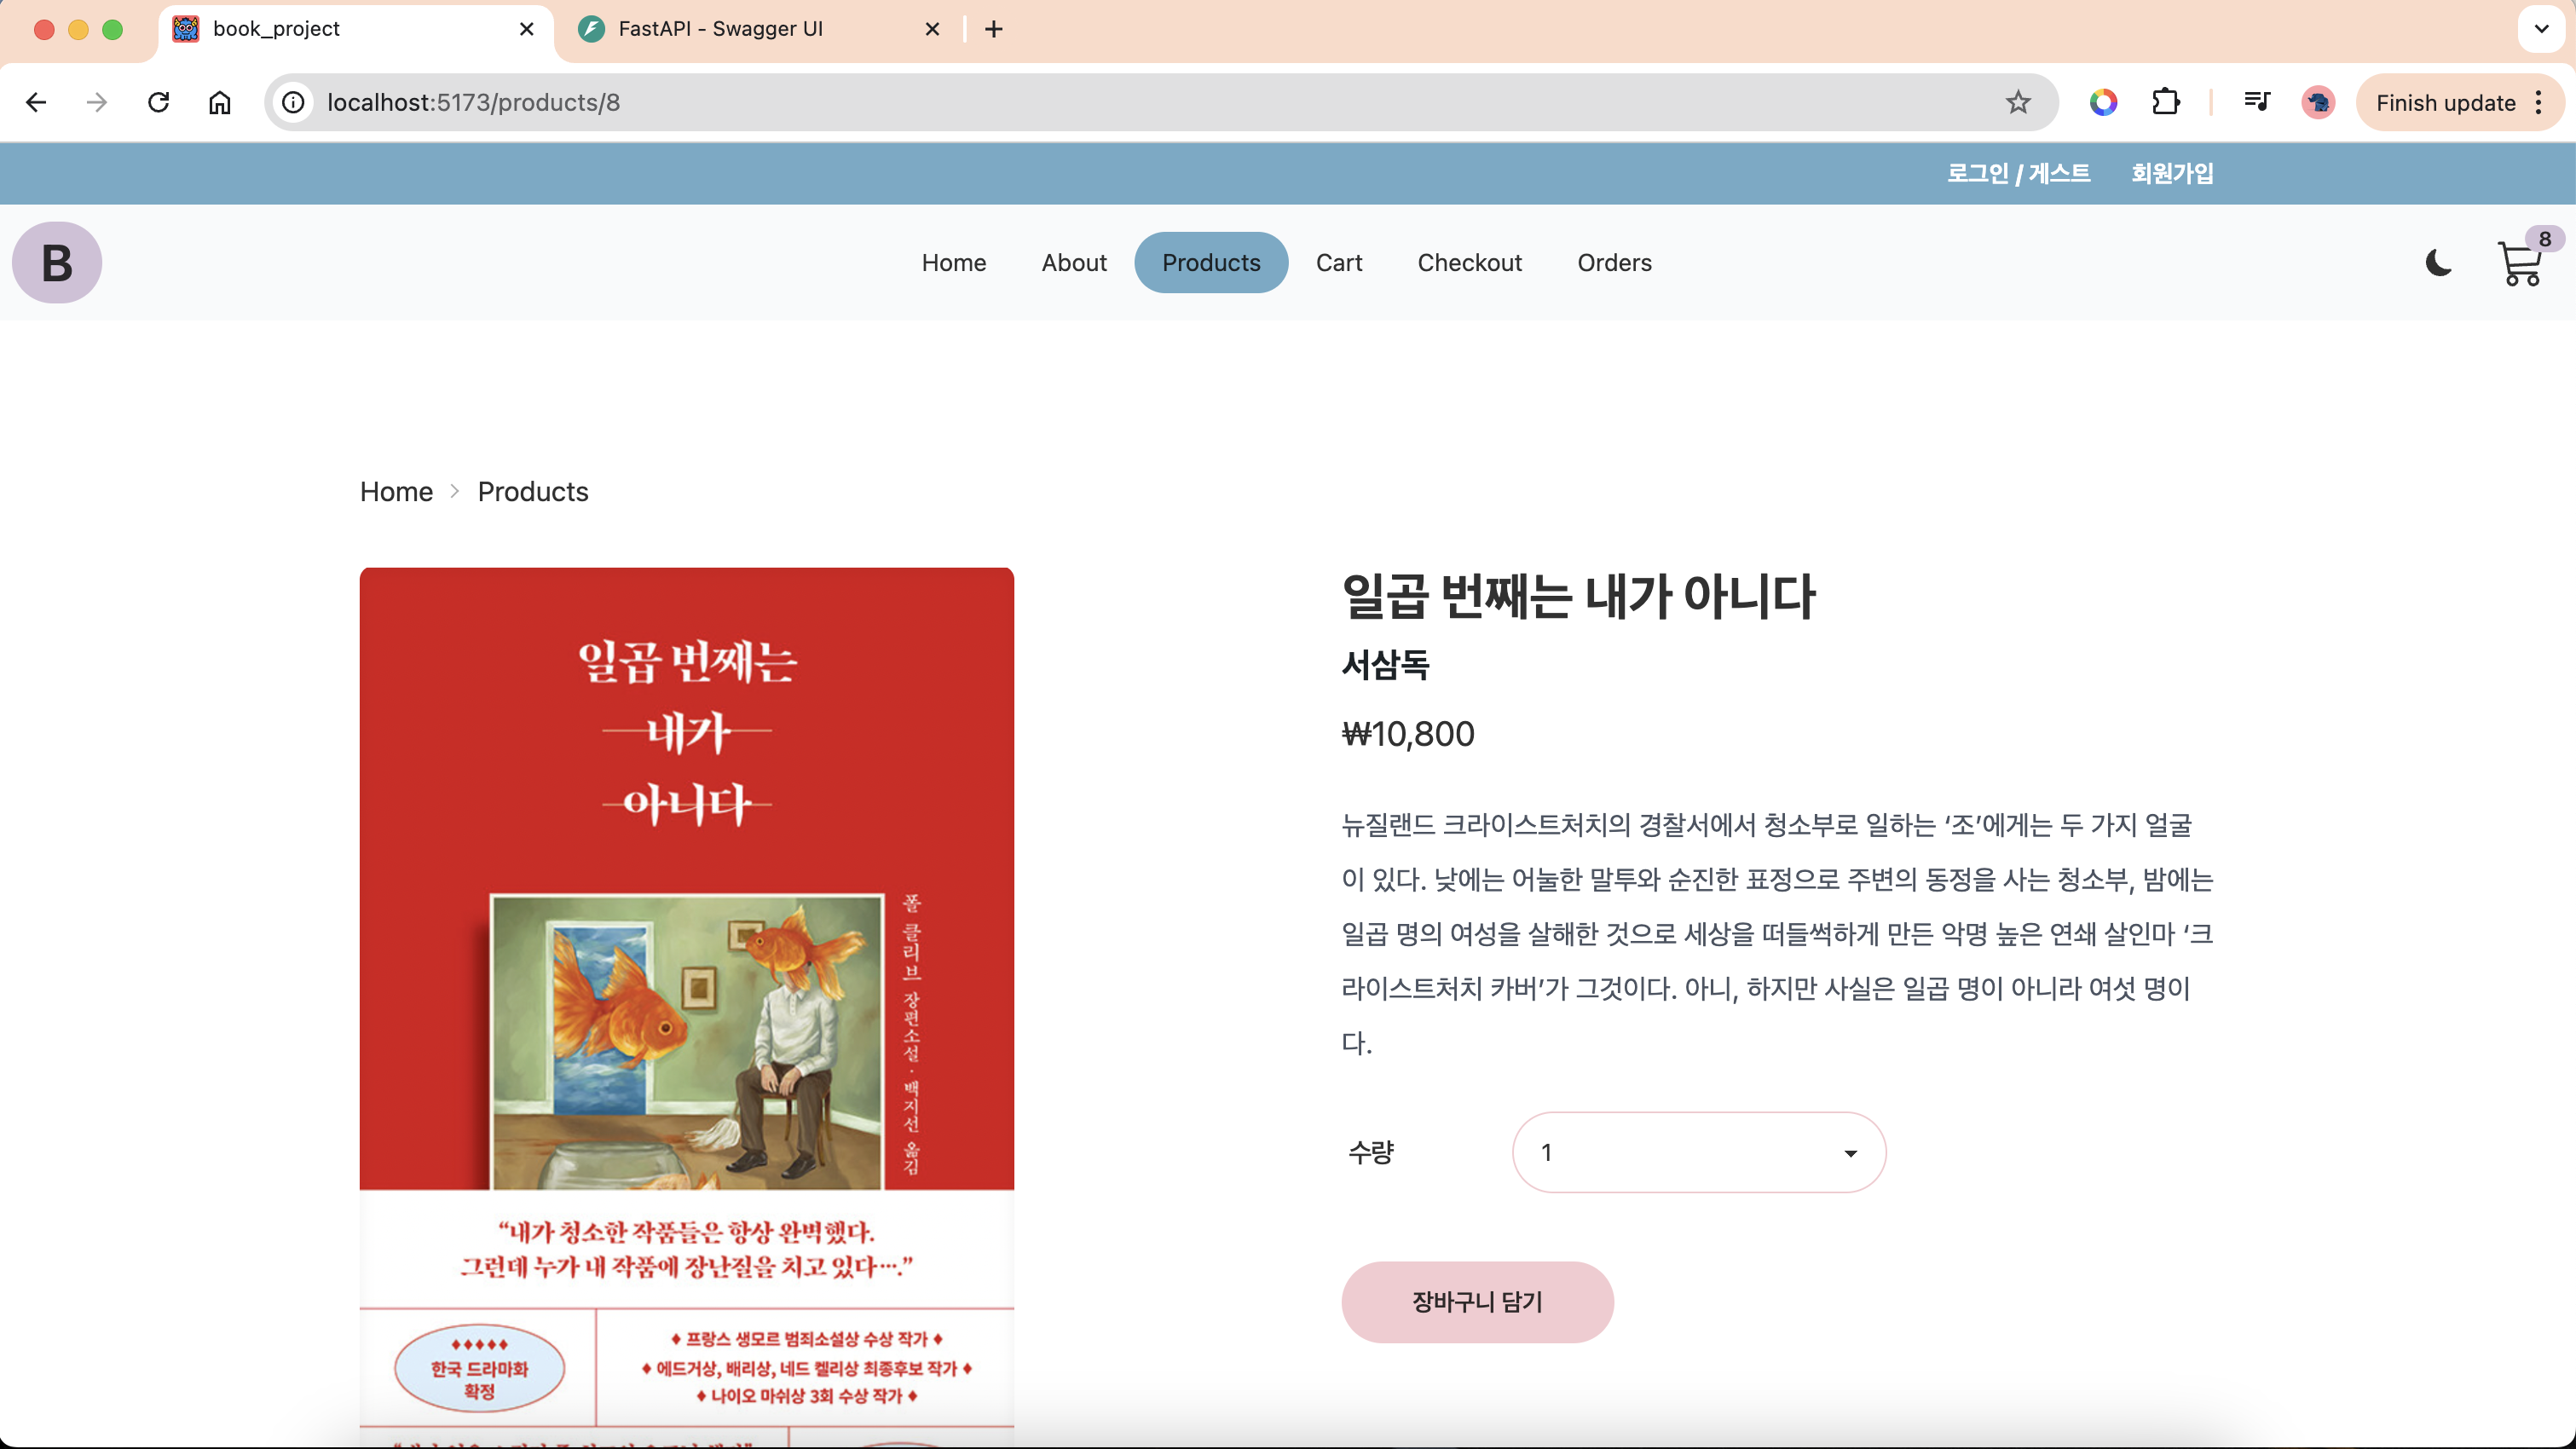
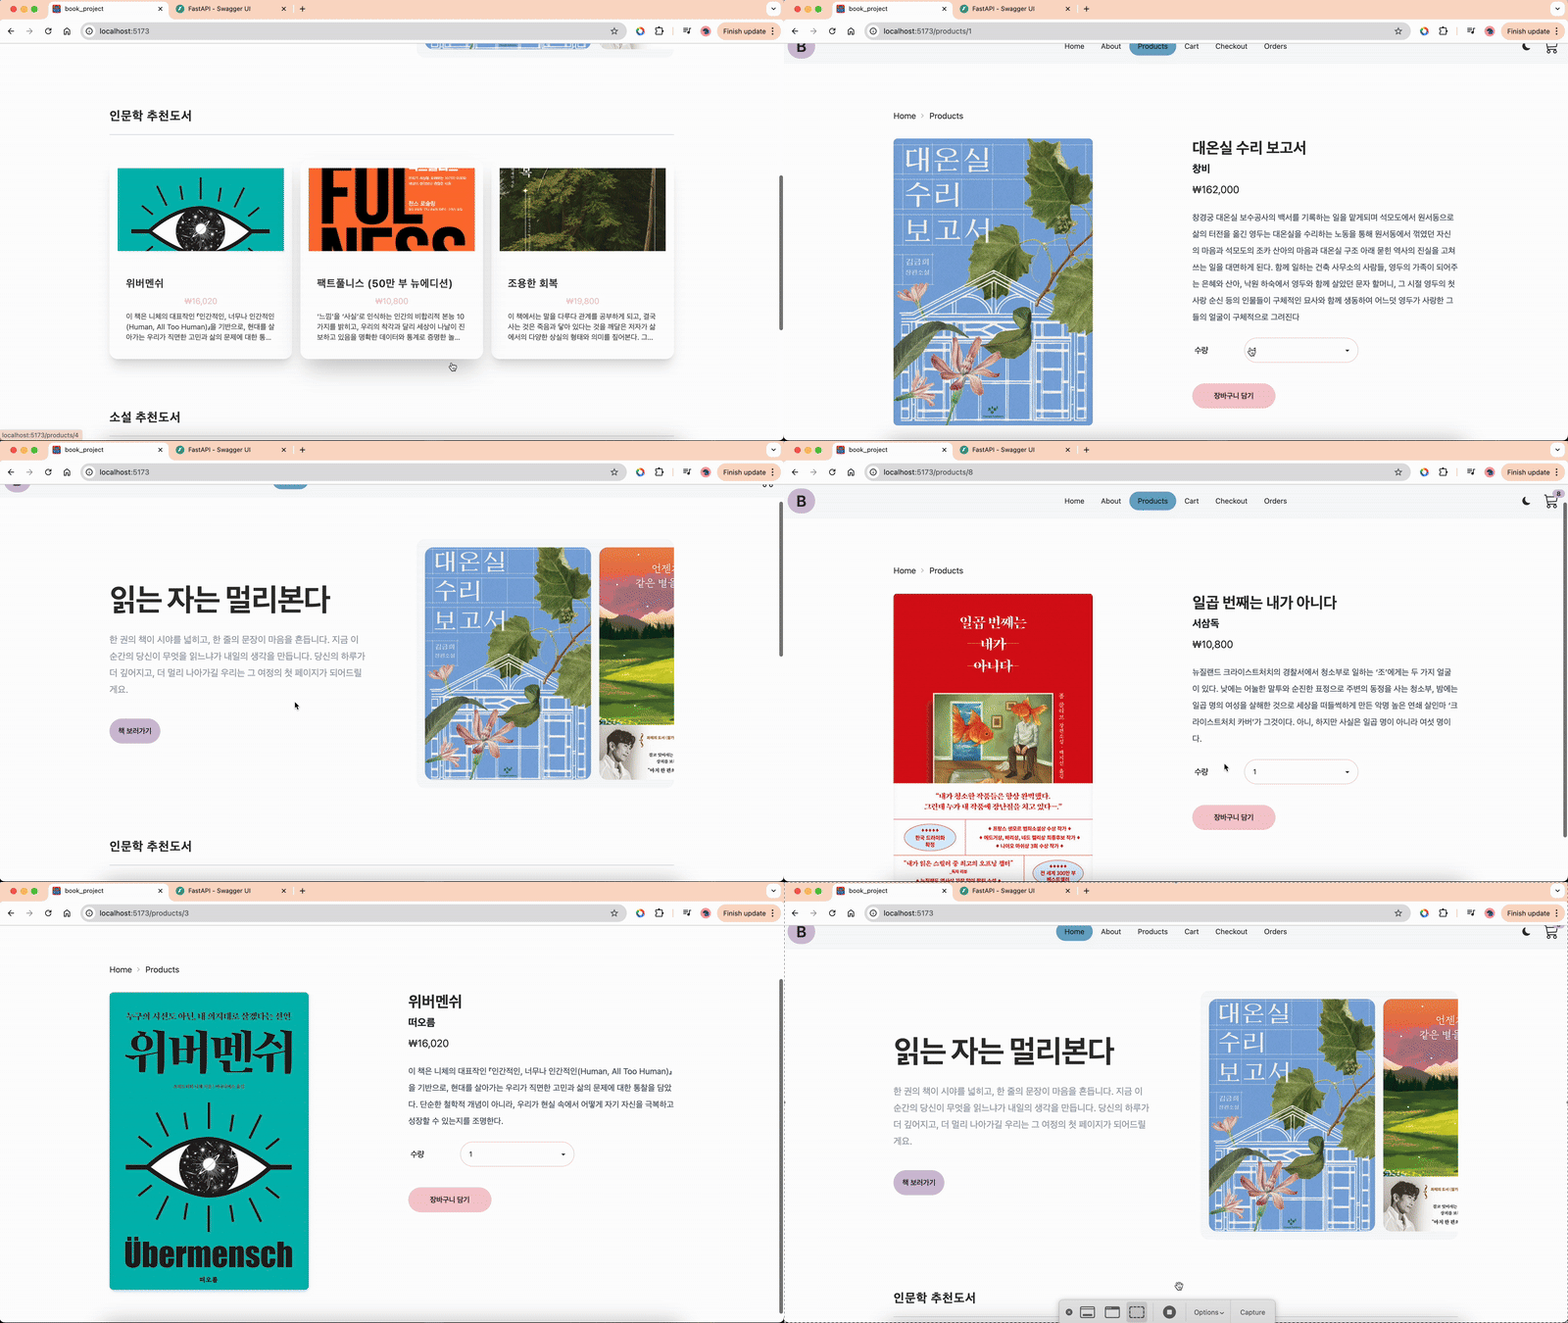
결과

개별 페이지 내용 잘 불러옴


>> 각 페이지마다 다른 결과 반환


배운점

1) FastAPI에서 DB 단건 데이터 조회 방법
- endpoints의 역할은 http 요청을 받고 내부함수 호출 후 응답을 주는 것(실제 내부처리는 다른 곳에서 함) 이런 구조는 DB 변경 등 다양한 변경에 유연하게 대처할 수 있게 함. 

- 쿼리를 만들고 실행까지 해야 정상적으로 response 모델에 넣을 수 있음


2) React에서 FastAPI 백단에 요청한 데이터를 화면에 뿌리는 방법(loader을 이용해서 데이터 fetch가 완료된 다음에 화면 구성하기)
- 화면에서 select 컴포넌트 사용 방법

Redis를 이용하면 속도를 높일 수 있다.


1. 문자열 SET/GET

# 문자열 SET/GET
SET color blue
GET color


2. 변경

값을 변경하면서 이전 값을 가져올 수 있음

SET color yellow GET # 결과: blue


3. XX 옵션

key 값이 이미 존재할 때만 실행

SET color_value red XX # 결과: NULL
SET color red XX # 결과: OK


4. NX 옵션

key 값이 존재하지 않을 때만 정상 실행 

SET color_value green NX # 결과: OK
SET color green # 결과 : NULL


5. EX 옵션

n초 후에 자동으로 데이터 삭제

SET color green EX 2 # 2초 후에 자동으로 삭제


6. MSET 명령어

여러 key-value를 한번에 SET

MSET color blue shape rectangle
MGET color shape


7. DEL 명령어

삭제 명령어

DEL color


8. GETRANGE/SETRANGE

SUBSTR과 비슷한 개념으로 조회 및 변경 모두 가능

SET shape rectangle
GETRANGE shape 0 2
SETRANGE shape 0 not # 0번 인덱스부터 변경


9. 숫자 연산

SET age 20
INCR age
DECR age
INCRBY age 10
INCRBYFLOAT age -0.3

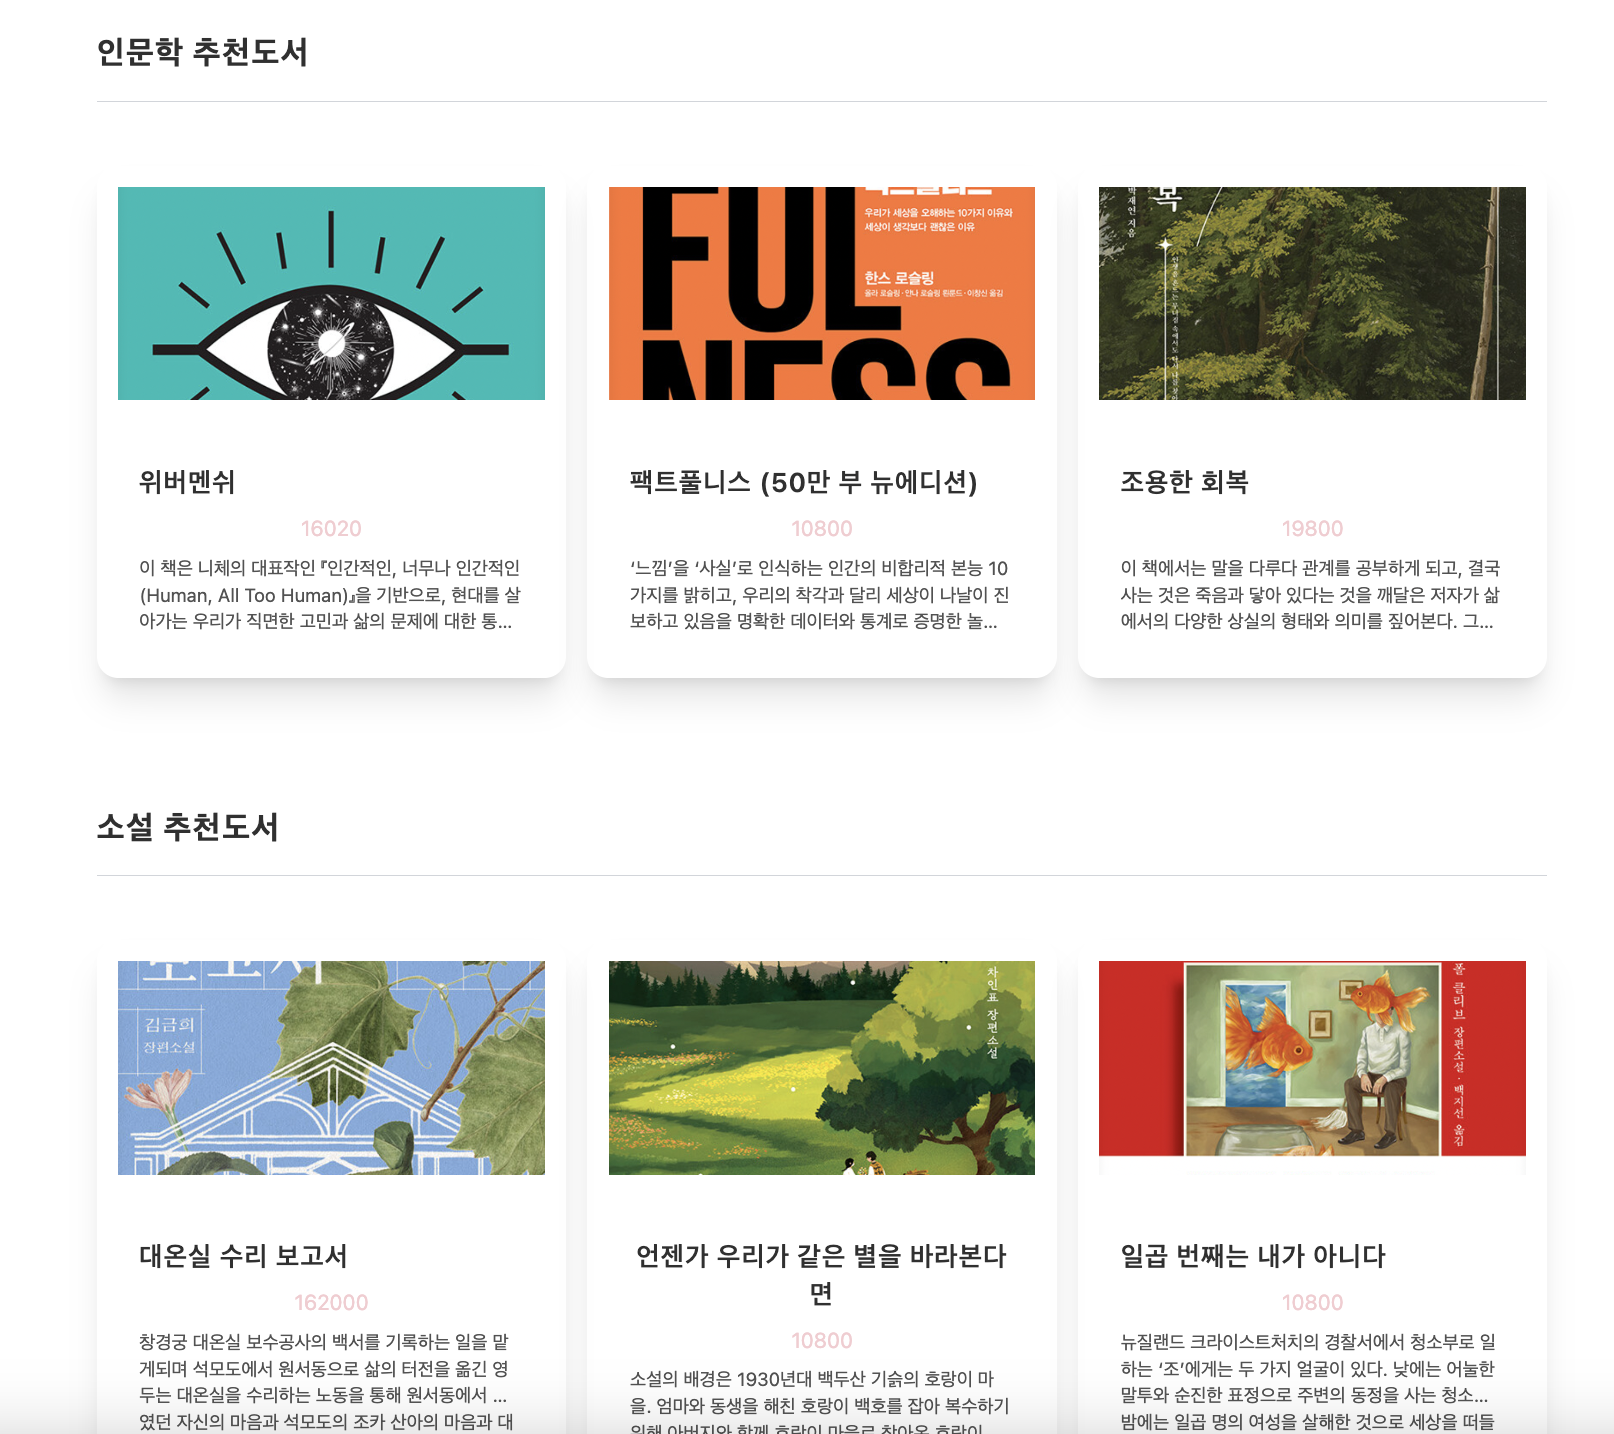
랜딩 페이지를 만들 때 인문학, 소설 등 카테고리별로 추천 서적을 보여주고 싶었다.


[React]

그리하여 우선  FeatureProducts라는 컴포넌트(제목 및 분야별 추천도서 목록을 보여주는 컴포넌트)에 category라는 매개변수로 인문학 학(humanities) 및 소설(novel) 값을 넘긴 후


// 클라이언트(리액트)
// pages/Landing.jsx
import { FeaturedProducts, Hero } from "../components";
import { customFetch } from "../utils";

// 전체 책 목록을 fetch
export const loader = async () => {
  const response = await customFetch('product');
  const products = response.data
  return {products}
};

const Landing = () => {
  return (
    <>
      <Hero />
      <FeaturedProducts text='인문학 추천도서' category='humanities'/>
      <FeaturedProducts text='소설 추천도서' category='novel'/>
    </>
  );
};
export default Landing;


다음으로 FeatureProduct 컴포넌트에서는 ProductsGrid(그리드로 카드를 3개씩 화면에 보여주는 컴포넌트)로 category를 넘기고 

// components/FeatureProducts.jsx
import ProductsGrid from "./ProductsGrid";
import SectionTitle from "./SectionTitle";

const FeaturedProducts = ({text, category}) => {
    return(
        <div className="pt-24">
            <SectionTitle text={text}/>
            <ProductsGrid category={category}/>
        </div>
    );
}

export default FeaturedProducts


ProductsGrid 컴포넌트에서는 카테고리를 인자값으로 받아 filter 함수를 통해 fetch한 데이터의 카테고리 값이 인자값으로 받은 카테고리와 동일한(즉 카테고리가 인문학이면 인문학 서적을) 데이터를 카드 형태로 반환한다. 

import { Link, useLoaderData } from "react-router-dom";

const ProductsGrid = ({category}) => {
  const { products } = useLoaderData();
  console.log("products", products)

  return (
    <div className="pt-12 grid gap-4 md:grid-cols-2 lg:grid-cols-3">
      {products.filter(p => p.category === category).
      slice(0,3).map((product) => {
        const { title, price, image, description } = product;
        return (
          <Link
            key={product.id}
            to={`/products/${product.id}`}
            className="card w-full shadow-xl hover:shadow-2xl transition duration-300 min-w-0"
          >
            <figure className="px-4 py-4">
              <img
                src={image}
                alt={title}
                className="rounded-xl, h-64 md:h-40 w-full object-cover"
              />
            </figure>
            <div className="card-body items-center min-w-0">
                <h2 className="card-title capitalize tracking-wider text-center w-full">{title}</h2>
                <span className="text-secondary">{price}</span>
                <p className="text-neutral-600 line-clamp-3 text-sm ">{description}</p>
            </div>
          </Link>
        );
      })}
    </div>
  );
};

export default ProductsGrid;


참고로 customFetch 함수의 경우 axios를 이용해 fetch한다

import axios from 'axios';

const productionUrl = 'http://127.0.0.1:8000'

export const customFetch = axios.create({
    baseURL : productionUrl
})


[FastAPI]

한편 서버에서는 데이터베이스에서 모든 항목을 다 조회하는 함수를 통해 값을 클라이언트로 전달한다.

from fastapi import HTTPException
from sqlalchemy.orm import Session
from app.models.product import Product

# 모든 항목 조회하기
def get_all_product(db: Session):
    return db.query(Product).all()


이렇게 개발할 경우 만약 과학이나 자기계발 등 새로운 항목이 추가 될 경우 아래 처럼 값을 계속 추가하면 된다.

      <FeaturedProducts text='인문학 추천도서' category='humanities'/>
      <FeaturedProducts text='소설 추천도서' category='novel'/>
      <FeaturedProducts text='과학 추천도서' category='science'/>
      <FeaturedProducts text='자기계발 추천도서' category='self_imporvement'/>


[랜딩페이지 최종]

[기술 아키텍처]

프론트 : React

백엔드 : FastAPI

DB : PostgresSQL


1. Hero 컴포넌트

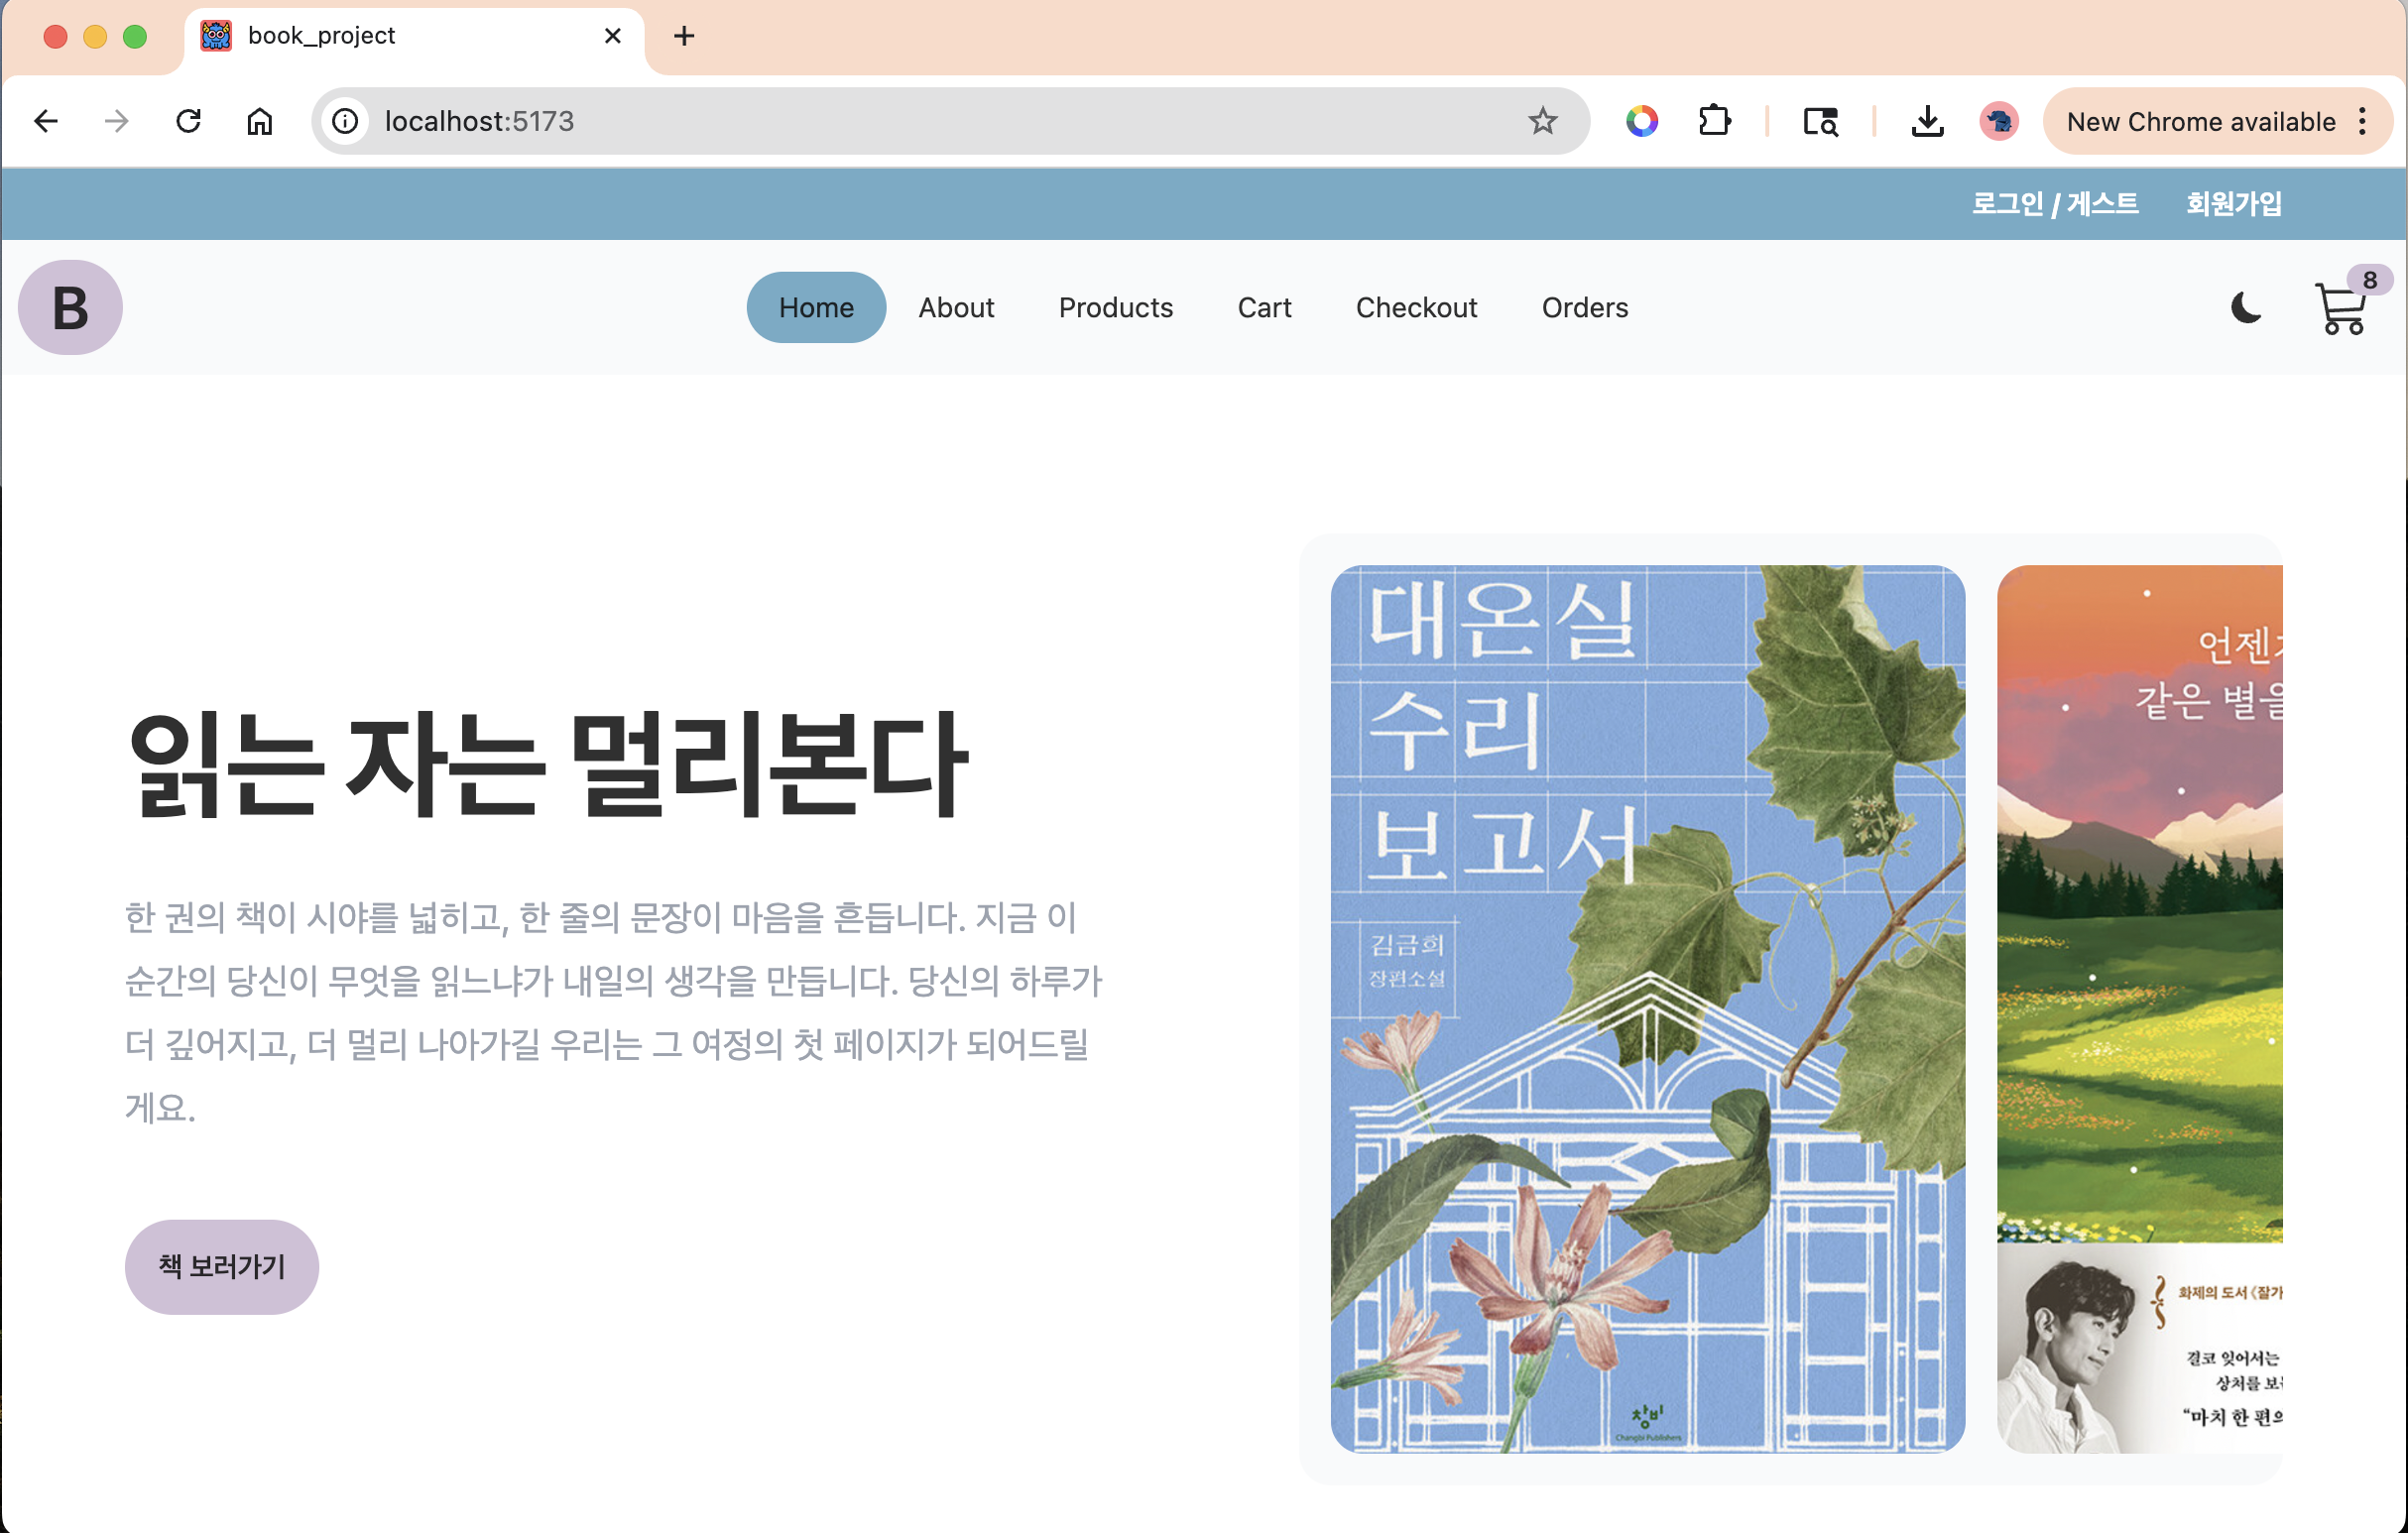
랜딩페이지에서 Hero 컴포넌트는 정적 서빙.

Daisy UI(https://v3.daisyui.com/)를 사용하여 carousel 사용

// components/Hero.jsx
import { Link } from "react-router-dom";

import hero1 from "../assets/hero1.png";
import hero2 from "../assets/hero2.png";
import hero3 from "../assets/hero3.png";
import hero4 from "../assets/hero4.png";
import hero5 from "../assets/hero5.png";

const carouselImages = [hero1, hero2, hero3, hero4, hero5];

const Hero = () => {
  return (
    <div className="grid lg:grid-cols-2 gap-24 items-center">
      <div>
        <h1 className="max-w-2xl text-4xl font-bold tracking-tight sm:text-6xl">
          읽는 자는 멀리본다
        </h1>
        <p className="mt-8 max-w-2xl text-lg leading-8 text-gray-400">
          한 권의 책이 시야를 넓히고, 한 줄의 문장이 마음을 흔듭니다. 지금 이
          순간의 당신이 무엇을 읽느냐가 내일의 생각을 만듭니다. 당신의 하루가 더
          깊어지고, 더 멀리 나아가길 우리는 그 여정의 첫 페이지가
          되어드릴게요.
        </p>
        <div className="mt-10">
          <Link to="/products" className="btn btn-primary">
            책 보러가기
          </Link>
        </div>
      </div>
      <div className="hidden h-[30rem] lg:carousel carousel-center p-4 space-x-4 bg-base-200 rounded-box">
        {carouselImages.map((image) => {
          return (
            <div key={image} className="carousel-item">
              <img
                src={image}
                className="rounded-box h-full w-80 object-cover"
              />
            </div>
          );
        })}
      </div>
    </div>
  );
};

export default Hero;


2. 랜딩 페이지에 추가

// pages/Landing.jsx
const Landing = () => {
  return (
    <>
      <Hero />
      <FeaturedProducts text='인문학 추천도서'/>
    </>
  );
};
export default Landing;


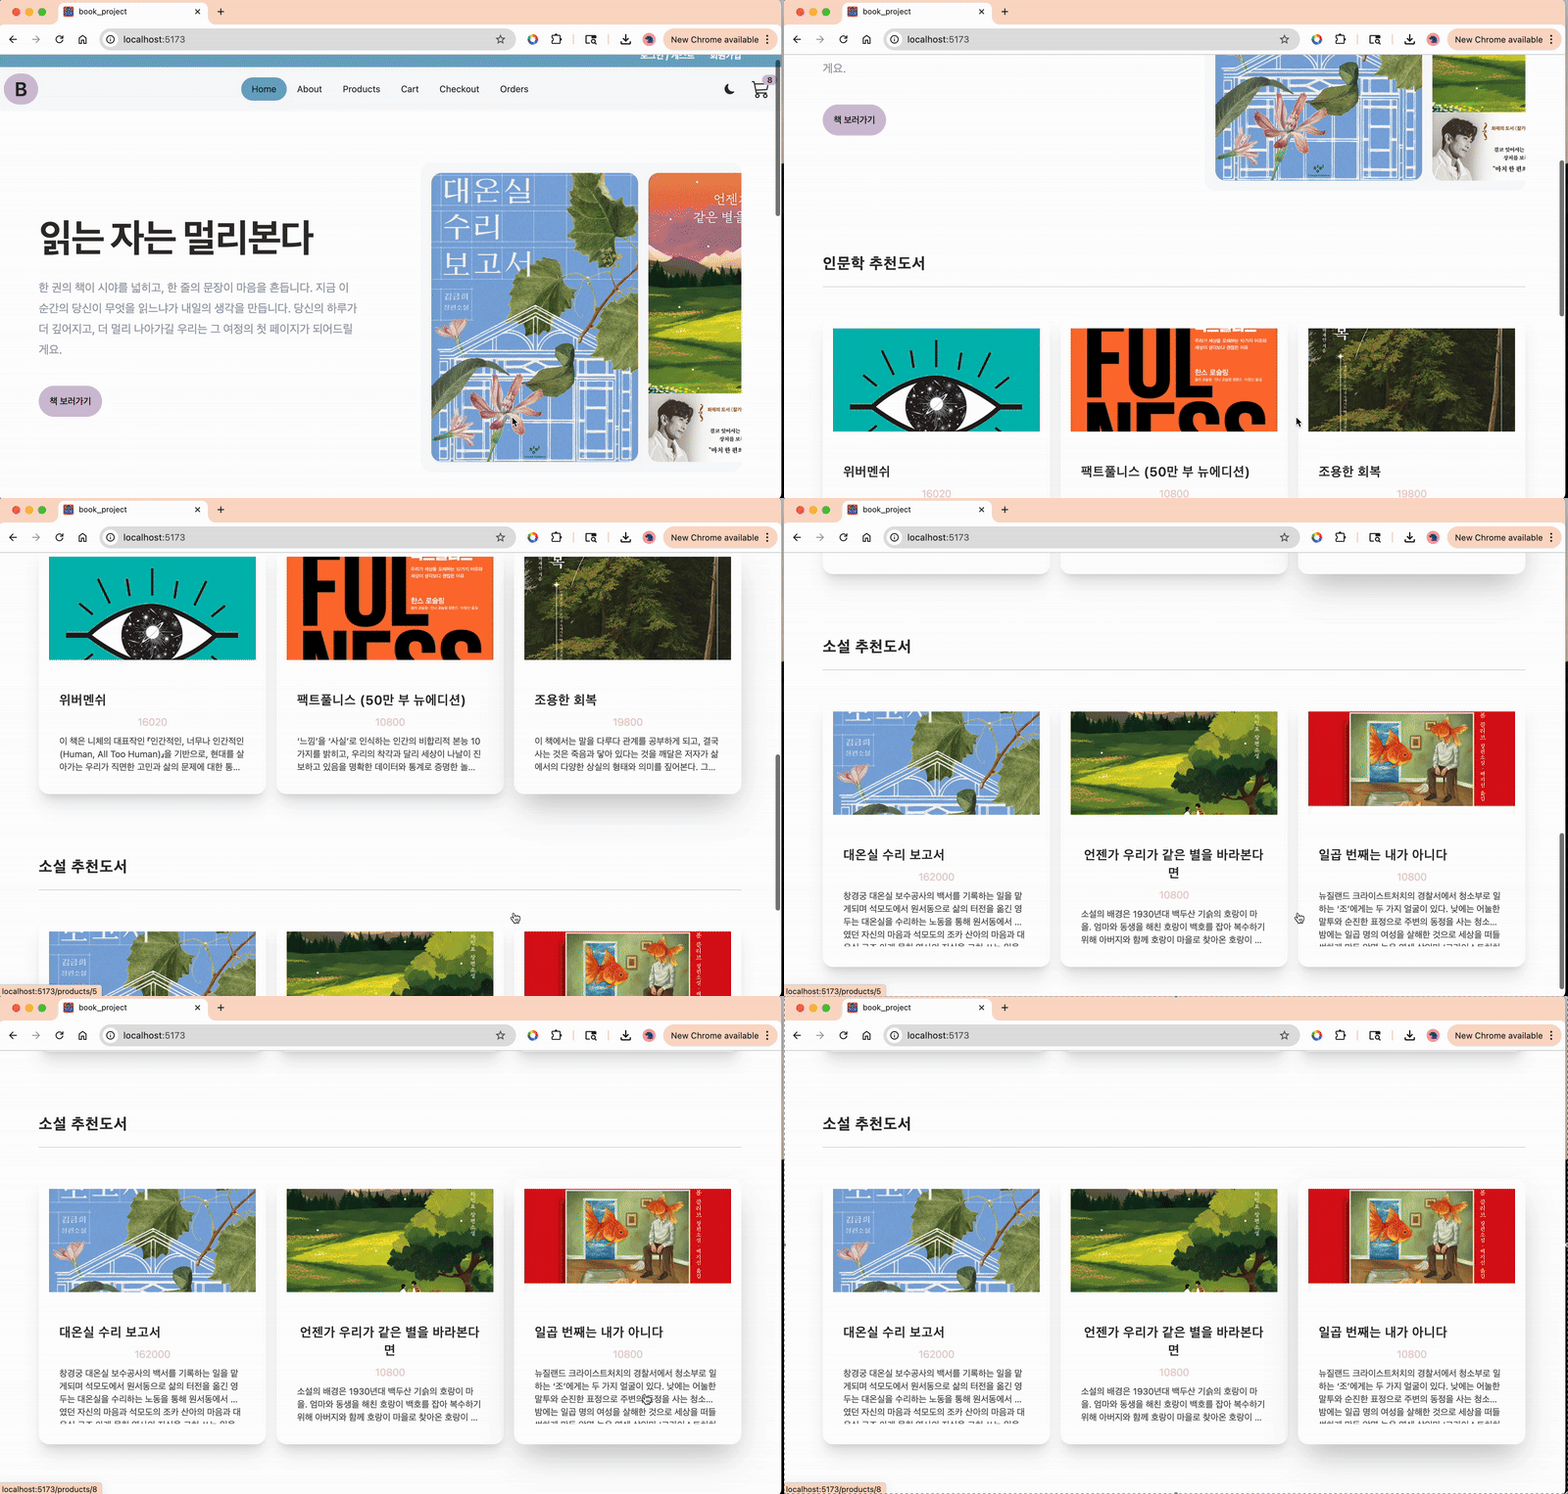
3. 결과


라우터를 사용하기 위해서 우선 아래 패키지를 설치한다.

npm i react-router-dom@6.22.3


나중에 또 보고 싶은 글만 모은 리스트 페이지를 만들어보자


1. 카드 컴포넌트에 체크박스(토글버튼) 추가

체크박스가 체크되어 있다면 isFavoriteListed 값은 True 반환.

토글버튼을 클릭하면 onChange 이벤트 핸들러가 호출되면서 블로그 아이디 값을 매개변수로 하는 toggleFavoriteList 함수 호출

                <label className="switch">
                    <input type="checkbox" checked={isFavoriteListed} onChange={() => toggleFavoriteList(blog.id)}></input>
                    <span className="slider">
                        <span className="slider-label">{isFavoriteListed ? "In List" : "Add to List"}</span>
                    </span>
                </label>


2. 리팩토링 진행

블로그 글을 fetch하고 상태 관리하는 부분을 App.js로 이동시켜 전역적으로 블로그 글 데이터를 사용할 수 있도록 함.

찜 목록을 만들기 위해 찜목록의 상태를 관리하는 useState 추가.

찜 목록에 없다면 추가하고 있다면 제외하는 토글 함수(toggleFavoriteList) 로직 추가

  // App.js에 추가
  // 찜목록 만들기
  const [favoriteList, setFavoriteList] = useState([]);

  // favoriteList를 업데이트 진행
  // 만약 현재 리스트에 블로그 아이디가 존재한다면 제외처리 없다면 추가
  const toggleFavoriteList = (blogId) => {
    setFavoriteList(prev =>
      prev.includes(blogId) ? prev.filter(id => id !== blogId) : [...prev, blogId]
    )
  }


2. Router를 이용해서 페이지 경로 분리

참고로 페이지 분리 후, 각 페이지별로 블로그 글 목록, 찜 목록, 토글 함수를 인자값으로 넘김

        <Router>
          <nav>
            <ul>
              <li>
                <Link to="/">Home</Link>
              </li>
              <li>
                <Link to="/favoriteList">Favorite List</Link>
              </li>
            </ul>
          </nav>
          <Routes>
            <Route path="/" element={<BlogGrid blogs={blogs} favoriteList={favoriteList} toggleFavoriteList={toggleFavoriteList} />}></Route>
            <Route path="/favoriteList" element={<FavoriteList favoriteList={favoriteList} blogs={blogs} toggleFavoriteList={toggleFavoriteList} />}></Route>
          </Routes>
        </Router>


3. 글 목록 페이지 수정

BlogGrid.js에서 필터링 된 블러그 값에 대해서 for문을 돌며 글 정보, 토글 함수, 찜 여부를 넘긴다

filteredBlogs.map(blog => (
                        <BlogCard blog={blog} 
                        key={blog.id} 
                        toggleFavoriteList={toggleFavoriteList}
                        isFavoriteListed={favoriteList.includes(blog.id)}></BlogCard>
                    ))


4. 찜 목록 페이지 수정

import React from "react";
import "../styles.css";
import BlogCard from "./BlogCard";

export default function FavoriteList({ blogs, favoriteList, toggleFavoriteList }) {
    return (
        <div>
            <h1 className="title">My Favorite List</h1>
            <div className="watchlist">
                {
                    favoriteList.map(id => {
                        const blog = blogs.find(blog => blog.id === id)
                        return <BlogCard key={id} blog={blog} toggleFavoriteList={toggleFavoriteList} isFavoriteListed={true}></BlogCard>
                    })
                }
            </div>
        </div>
    )
}


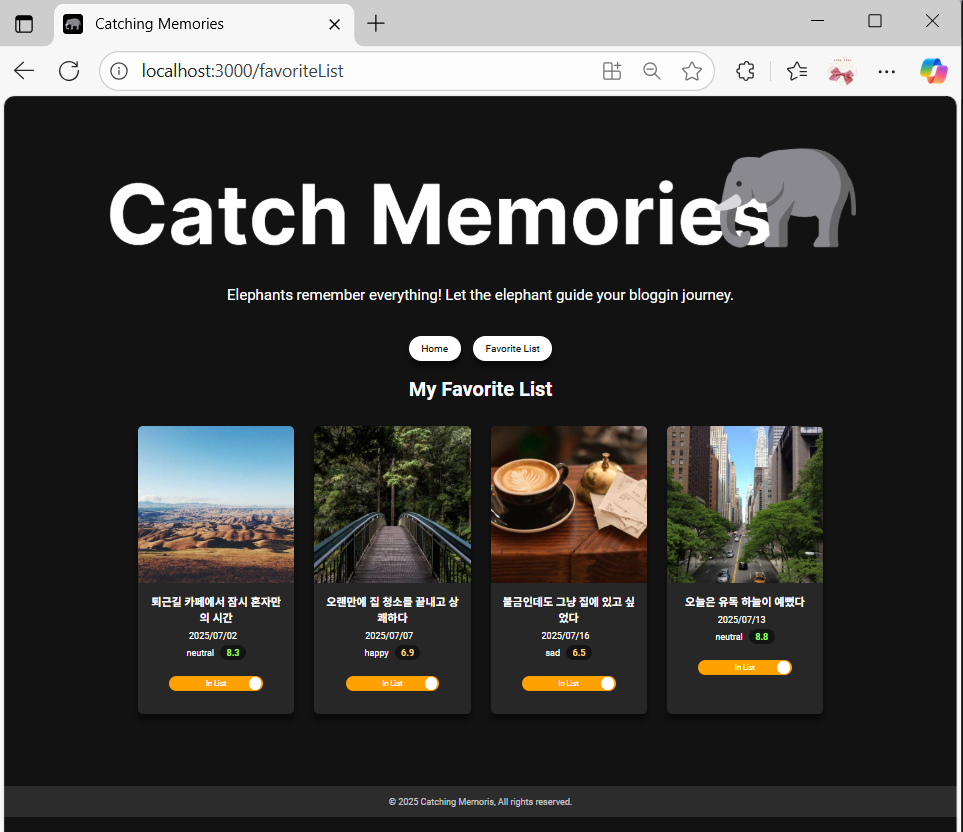
5. 결과

토글된 결과를 보여주는 페이지

참고로 이번 웹페이지 제작 실습은 DB를 연결하지 않았기 때문에 useState가 App.js에서 관리되는 등 일반적인 웹페이지 제작과는 다른 형태로 개발되었다. 향후 DB가 연결된다면 다른 형태로 설계될 것이다.


최종 코드

// App.js
import './App.css';
import './styles.css';
import Header from './components/Header';
import Footer from './components/Footer';
import BlogGrid from './components/BlogGrid';
import FavoriteList from './components/FavoriteList';
import { BrowserRouter as Router, Routes, Route, Link } from "react-router-dom"
import React, { useState, useEffect } from 'react';

function App() {

  // 블로그 상태를 업데이트 한다
  const [blogs, setBlogs] = useState([]);

  // 찜목록 만들기
  const [favoriteList, setFavoriteList] = useState([]);

  // favoriteList를 업데이트 진행
  // 만약 현재 리스트에 블로그 아이디가 존재한다면 제외처리 없다면 추가
  const toggleFavoriteList = (blogId) => {
    setFavoriteList(prev =>
      prev.includes(blogId) ? prev.filter(id => id !== blogId) : [...prev, blogId]
    )
  }

  // fetch로 데이터를 가져온 후 json으로 변환 후 blogs 배열을 업데이트 한다. 
  useEffect(() => {
    fetch("blog.json")
      .then(response => response.json())
      .then(data => setBlogs(data))

  }, [])
  return (
    <div className="App">
      <div className='container'>
        <Header></Header>

        <Router>
          <nav>
            <ul>
              <li>
                <Link to="/">Home</Link>
              </li>
              <li>
                <Link to="/favoriteList">Favorite List</Link>
              </li>
            </ul>
          </nav>
          <Routes>
            <Route path="/" element={<BlogGrid blogs={blogs} favoriteList={favoriteList} toggleFavoriteList={toggleFavoriteList} />}></Route>
            <Route path="/favoriteList" element={<FavoriteList favoriteList={favoriteList} blogs={blogs} toggleFavoriteList={toggleFavoriteList} />}></Route>
          </Routes>
        </Router>
      </div>
      <Footer></Footer>
    </div>
  );
}

export default App;


// BlogCard.js
import React from "react";
import "../styles.css"

// 이미지를 못 불러올 경우 예외 처리
const handleError = (e) => {
    e.target.src = "images/default.jpg"
}

// 평점에 따른 UI 변경
const getScoreClass = (score) => {
    if (score > 8) return "score-good"
    if (score >= 5 && score < 8) return "score-ok"
    if (score < 5) return "score-bad"

}
export default function BlogCard({ blog, isFavoriteListed, toggleFavoriteList }) {

    return (
        <div key={blog.id} className='blog-card'>
            <img src={blog.image} alt={blog.title} onError={handleError} />
            <div className='blog-card-info'>
                <h3 className='blog-card-title'>{blog.title}</h3>
                <p className='blog-card-mood'>{blog.date}</p>
                <div>
                    <span className='blog-card-mood'>{blog.mood}</span>
                    <span className={`blog-card-score ${getScoreClass(blog.score)}`}>{blog.score}</span>
                </div>
                <label className="switch">
                    <input type="checkbox" checked={isFavoriteListed} onChange={() => toggleFavoriteList(blog.id)}></input>
                    <span className="slider">
                        <span className="slider-label">{isFavoriteListed ? "In List" : "Add to List"}</span>
                    </span>
                </label>
            </div>
        </div>
    )

}


// BlogGrid.js
import React, { useState } from 'react';
import '../styles.css';
import BlogCard from './BlogCard';


export default function BlogGrid({ blogs, favoriteList, toggleFavoriteList }) {

    // 검색용
    const [searchTerm, setSearchTerm] = useState("");
    // 기분 필터링용
    const [mood, setMood] = useState("All Moods");
    // 점수 필터링용
    const [score, setScore] = useState("All");

    const handleSearchChange = (e) => {
        // 입력창의 값을 searchTerm 변수에 실시간 업데이트 진행
        setSearchTerm(e.target.value)
    }

    // 콤보박스에서 mood 값 받기
    const handleMoodChange = (e) => {
        setMood(e.target.value)
    }

    // 콤보박스에서 평점 값 받기
    const handleScoreChange = (e) => {
        setScore(e.target.value)
    }

    // 감정 상태  필터링
    const matchesMood = (blog, mood) => {
        return mood === 'All Moods' || blog.mood.toLowerCase() === mood.toLowerCase();
    }

    // 영화 제목 필터링
    const matchesSearchTerm = (blog, searchTerm) => {
        return blog.title.toLowerCase().includes(searchTerm.toLowerCase())
    }

    // 영화 평점 필터링
    const matchesScore = (blog, score) => {
        let check_rating;
        if (blog.score > 8) {
            check_rating = 'Good'
        } else if (blog.score <= 8 && blog.score >= 5) {
            check_rating = 'Ok'
        } else if (blog.score < 5) {
            check_rating = 'Bad'
        }
        return score === 'All' || check_rating.toLowerCase() === score.toLowerCase()
    }

    // 블로그 필터링
    const filteredBlogs = blogs.filter(blog =>
        matchesMood(blog, mood) &&
        matchesScore(blog, score) &&
        matchesSearchTerm(blog, searchTerm)
    )


    return (
        <div>
            <input type="text"
                className='search-input'
                placeholder="Search Blogs..."
                value={searchTerm}
                onChange={handleSearchChange}
            />
            <div className='filter-bar'>
                <div className='filter-slot'>
                    <label>기분</label>
                    <select className='filter-dropdown' value={mood} onChange={handleMoodChange}>
                        <option>All Moods</option>
                        <option>happy</option>
                        <option>sad</option>
                        <option>tired</option>
                        <option>angry</option>
                        <option>anxious</option>
                        <option>neutral</option>
                    </select>
                </div>

                <div className='filter-slot'>
                    <label>점수</label>
                    <select className='filter-dropdown' value={score} onChange={handleScoreChange}>
                        <option>All</option>
                        <option>Good</option>
                        <option>Ok</option>
                        <option>Bad</option>
                    </select>
                </div>
            </div>
            <div className='blogs-grid'>
                {
                    filteredBlogs.map(blog => (
                        <BlogCard blog={blog} 
                        key={blog.id} 
                        toggleFavoriteList={toggleFavoriteList}
                        isFavoriteListed={favoriteList.includes(blog.id)}></BlogCard>
                    ))
                }
            </div>
        </div>
    )
}


[참고] Develop React JS web applications including components, state, effect, hooks, React router, reducer, context, etc.
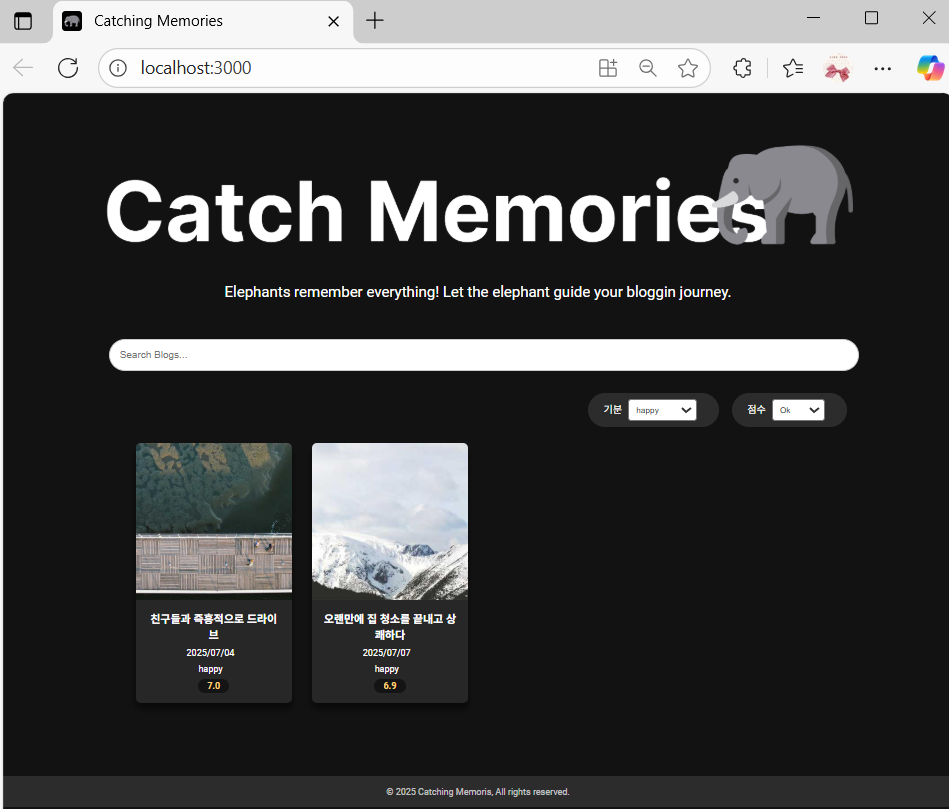
장르 및 평점 별로 필터링 진행(드롭다운 목록 이용)


1. 데이터 상태를 관리할 수 있도록 useState 사용

    // 기분 필터링용
    const [mood, setMood] = useState("All Moods");
    // 점수 필터링용
    const [score, setScore] = useState("All");


2. 드롭다운 목록 만들기 

이 때 드롭다운 목록의 값(value={mood})로 받아서 드롭다운에 이벤트가 발생할 때 handleMoodChange 함수를 호출한다.

 <div className='filter-bar'>
                <div className='filter-slot'>
                    <label>기분</label>
                    <select className='filter-dropdown' value={mood} onChange={handleMoodChange}>
                        <option>All Moods</option>
                        <option>happy</option>
                        <option>sad</option>
                        <option>tired</option>
                        <option>angry</option>
                        <option>anxious</option>
                        <option>neutral</option>
                    </select>
                </div>

                <div className='filter-slot'>
                    <label>점수</label>
                    <select className='filter-dropdown' value={score} onChange={handleScoreChange}>
                        <option>All</option>
                        <option>Good</option>
                        <option>Ok</option>
                        <option>Bad</option>
                    </select>
                </div>
            </div>


3. 데이터 상태 업데이트

onChange 이벤트 핸들러에 의해 아래 함수가 호출되면 useState에서 관리하는 mood, score 값 업데이트 진행.

    // 콤보박스에서 mood 값 받기
    const handleMoodChange = (e) => {
        setMood(e.target.value)
    }

    // 콤보박스에서 평점 값 받기
    const handleScoreChange = (e) => {
        setScore(e.target.value)
    }


4. 필터링

기분에 대한 필터링을 먼저 진행한 후 순차적으로 점수 및 제목에 대한 필터링 진행

    // 감정 상태  필터링
    const matchesMood = (blog, mood) => {
        return mood === 'All Moods' || blog.mood.toLowerCase() === mood.toLowerCase();
    }

     // 영화 제목 필터링
    const matchesSearchTerm = (blog, searchTerm) => {
        return blog.title.toLowerCase().includes(searchTerm.toLowerCase())
    }
    
    // 기분 점수 필터링
    const matchesScore = (blog, score) => {
        let check_rating;
        if (blog.score > 8) {
            check_rating = 'Good'
        } else if (blog.score <= 8 && blog.score >= 5) {
            check_rating = 'Ok'
        } else if (blog.score < 5) {
            check_rating = 'Bad'
        }
        return score === 'All' || check_rating.toLowerCase() === score.toLowerCase()
    }

    // 블로그 필터링
    const filteredBlogs = blogs.filter(blog =>
        matchesMood(blog, mood) &&
        matchesScore(blog, score) &&
        matchesSearchTerm(blog, searchTerm)
    )


5.결과

Mood는 happy, 기분점수는 Ok인 블로그 글 필터링

'


+ Recent posts